


Cone volume reference guide
Using the cone volume formula without mixing up the measurements
Start with the measurement that actually stands upright
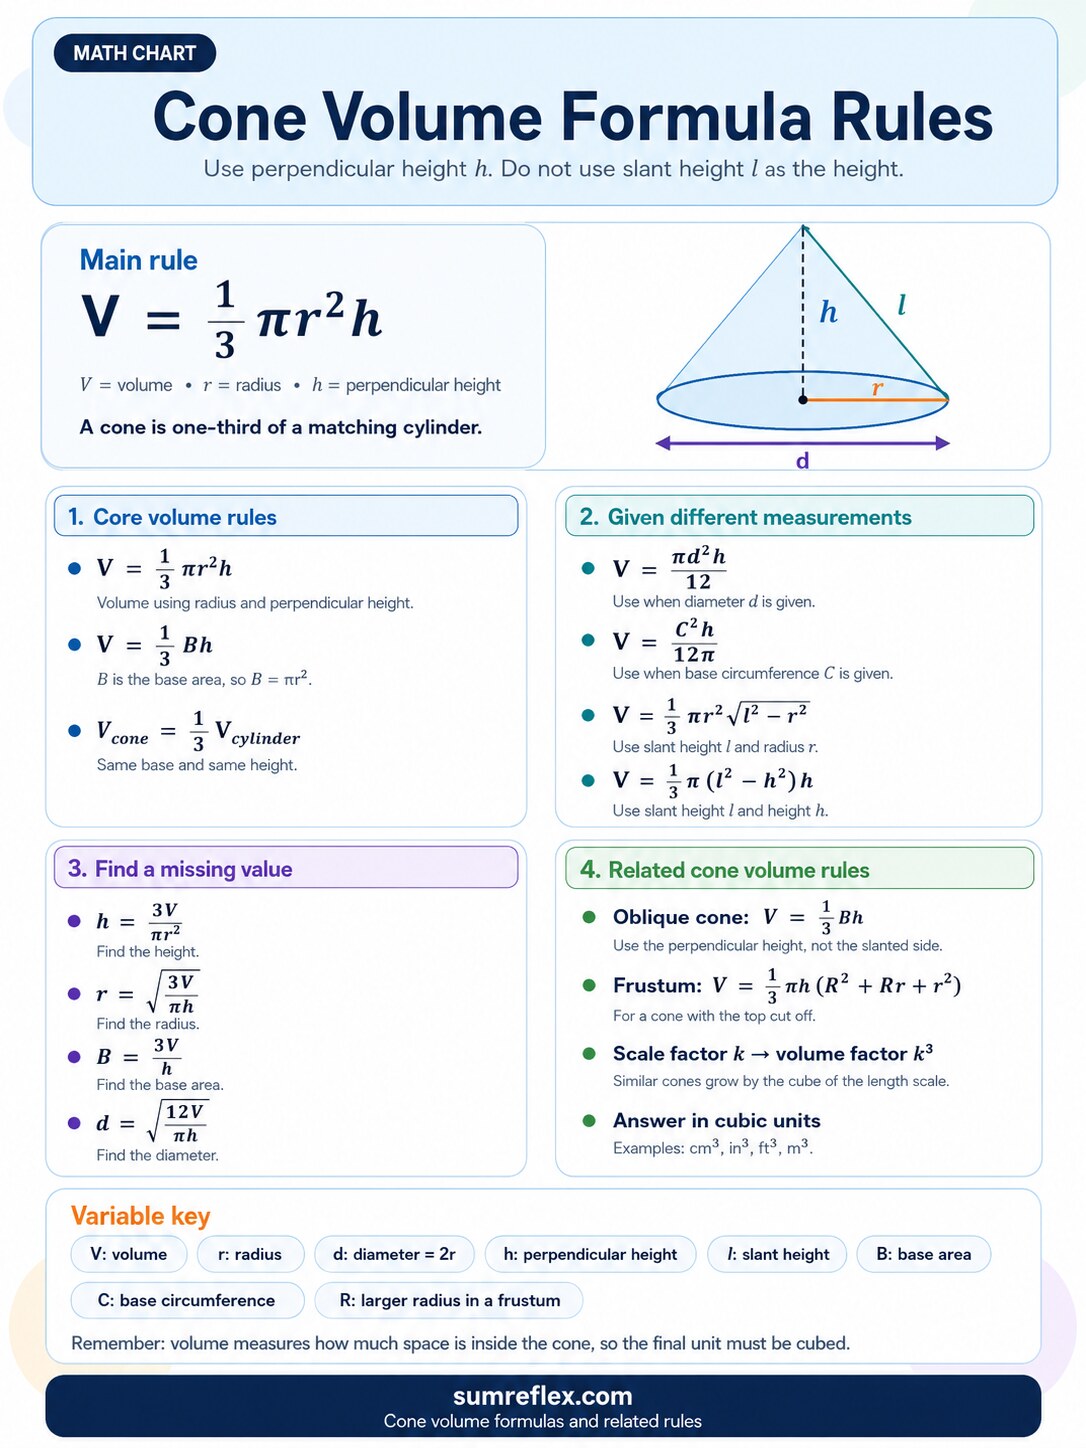
The most important habit with cone volume is checking the height before doing any arithmetic. The formula uses perpendicular height, which is the straight distance from the center of the base to the apex. The slanted side of the cone may look like a height in a drawing, but it is not the height for volume.
This chart keeps the perpendicular height label near the cone diagram for that reason. Before students substitute numbers, have them point to the radius, diameter, slant height, and vertical height. A few seconds of labeling usually prevents the biggest cone-volume mistake.
Read the one-third rule as a cylinder comparison
The formula V = 1/3 pi r2h is easier to remember when students connect it to a cylinder. A cylinder with the same circular base and height has volume pi r2h. A matching cone has one third of that volume.
That comparison is a useful teaching move because it keeps the formula from feeling random. The base area still comes from the circle, the height still tells how far the solid extends upward, and the one-third factor accounts for the tapering shape.
Use the diameter form only when diameter is given
Many textbook problems give diameter instead of radius. Students can always divide the diameter by 2 first, but the chart also includes V = pi d2h / 12 for quick reference. That formula is the same rule rewritten after replacing radius with half the diameter.
It is still worth saying the radius step out loud. If a student accidentally puts the full diameter into \(r^2\), the answer becomes four times too large. The chart gives the shortcut, but the concept is still radius-based.
Missing-value formulas should come after setup
The chart includes forms for finding height, radius, base area, and diameter when volume is known. Those are helpful during review, but students should understand that each one comes from the same cone formula. They are rearrangements, not separate cone facts.
A strong written solution still starts with the original relationship. Write V = 1/3 pi r2h, substitute the known values, and then solve for the unknown. The chart is there to support that process, not to replace it with guessing.
Pair the chart with a worked lesson
Use the volume of a cone lesson when students need examples, diameter practice, and the slant-height warning explained step by step. Use the geometry formula wall chart when they need to compare cone volume with other area, surface area, and volume formulas.
After students choose the right formula, the Volume Calculator can check numerical work. The printable should stay beside the written setup so students keep connecting the diagram, the formula, the units, and the final answer.