



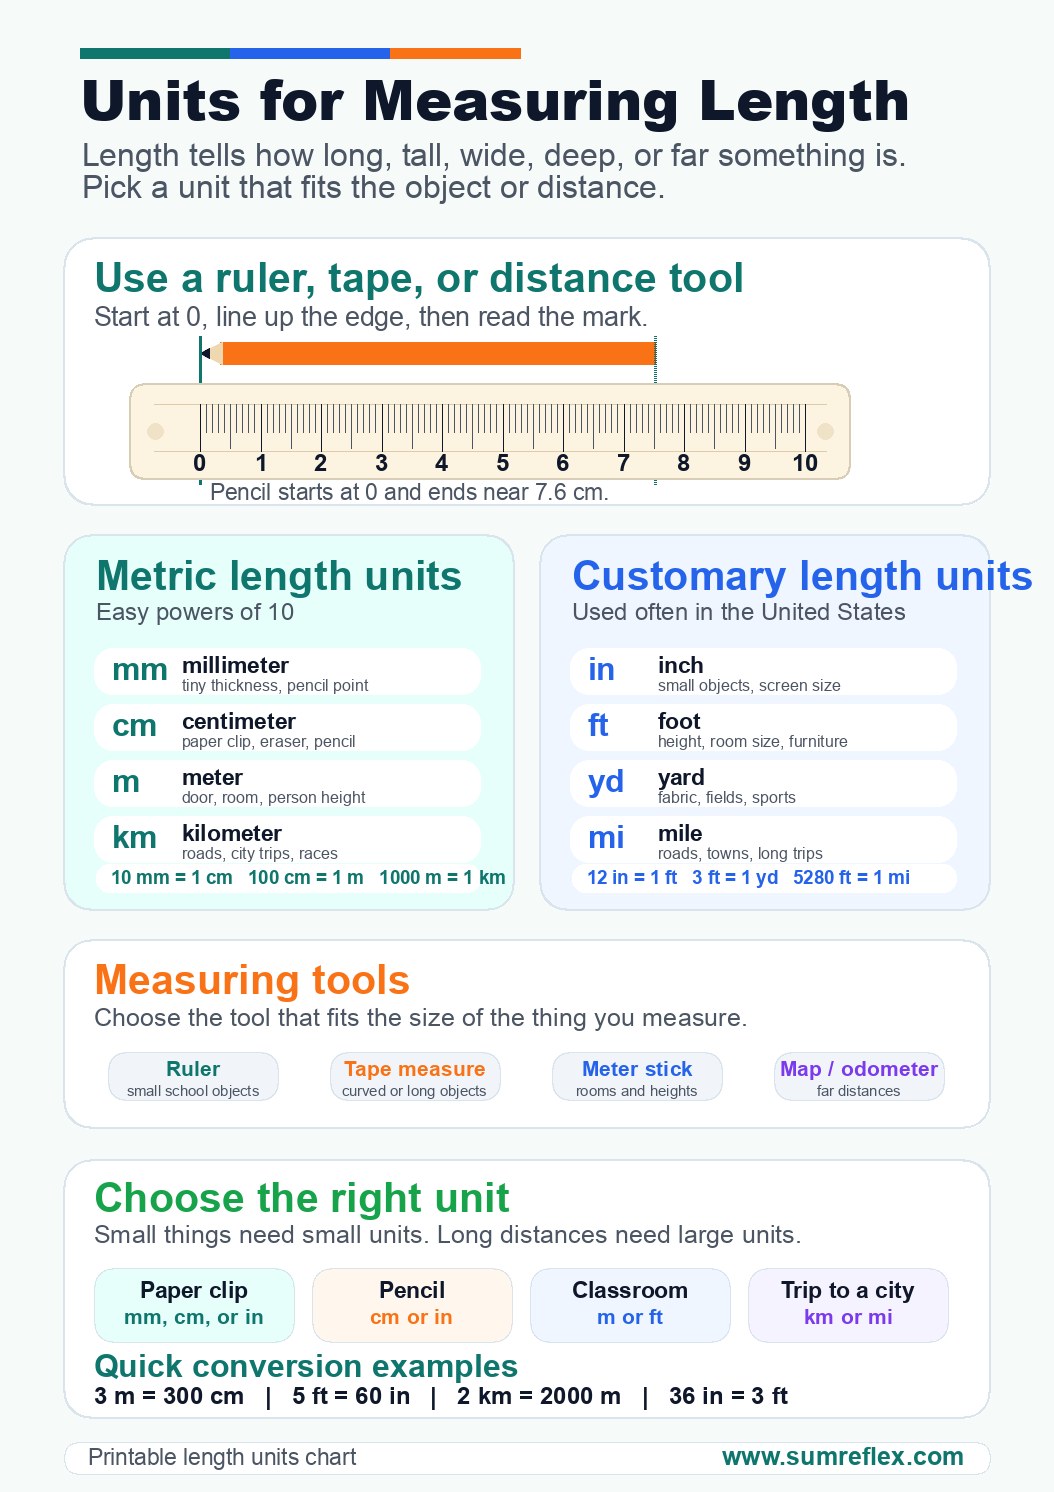
Length measurement guide
Choosing a sensible length unit before measuring
Length can describe several directions
Length is not only the distance from the left end of an object to the right end. Students use length language when they ask how long, how tall, how wide, how deep, or how far something is. A pencil has a length, a door has a height, a desk has a width, a pool has a depth, and a road trip has a distance. This chart gives students a single place to see that all of those questions belong to length measurement.
The first decision should always be the size of the thing being measured. A tiny object needs a small unit. A classroom object needs a moderate unit. A trip between cities needs a large distance unit. When students choose the unit before touching a ruler, their measurement is more likely to make sense.
Object size tells the unit story
Millimeters work well for very small thicknesses, tiny marks, or short parts on a ruler. Centimeters fit many classroom objects such as erasers, pencils, notebooks, and craft pieces. Meters are useful for desks, doors, rooms, and body height. Kilometers belong to long distances such as routes, races, and travel. The customary system has a similar scale: inches for small objects, feet for people and furniture, yards for larger spaces, and miles for roads or long travel.
A helpful practice activity is to name an object and ask students for a unit that would not be sensible. Measuring a pencil in kilometers is possible in theory, but it is not a practical classroom unit. Measuring a road trip in millimeters creates a number too large to be useful. The chart helps students understand that units are chosen for clarity, not only correctness.
Tools should match the measurement job
A ruler is convenient for straight, short objects. A tape measure works better for people, furniture, walls, or curved surfaces. A meter stick can support classroom demonstrations where students need to see a larger standard unit. Digital maps, odometers, and road signs belong to long-distance measurement. The chart connects these tools to the units students are likely to use with them.
This tool choice is a useful conversation during hands-on lessons. Ask students why a ruler is awkward for measuring the length of a room or why a tape measure is unnecessary for a paper clip. The answer is not only about convenience. The tool affects how accurately and efficiently the unit can be used.
Keeping metric and customary systems separate enough
Seeing metric and customary units on one chart is helpful, but students should not mix systems casually inside one measurement. A length might be recorded in centimeters or in inches, but the unit needs to be stated clearly. The chart can support comparison without suggesting that every problem requires conversion. Many classroom tasks ask for one system only.
When a problem does require changing units, the units of length conversion chart gives the conversion steps. This page is the earlier decision point: what kind of length is being measured and which unit is sensible before any conversion begins.
Where this page fits with younger learners
For Grade 1 and early measurement lessons, the Grade 1 measurement basics chart should come first because it teaches fair measuring with same-size units, no gaps, and no overlaps. This length-units page becomes more useful once students are ready for named units such as centimeters, meters, inches, and feet.
For older learners, the chart can sit beside word problems. If the question says a hallway is 12 something, students should decide whether 12 centimeters, 12 meters, or 12 miles is reasonable. That reasonableness check prevents unit answers from becoming random labels added after arithmetic.