



Circle theorem guide
Choosing the correct circle angle rule from the diagram
Start with the vertex, not the circle
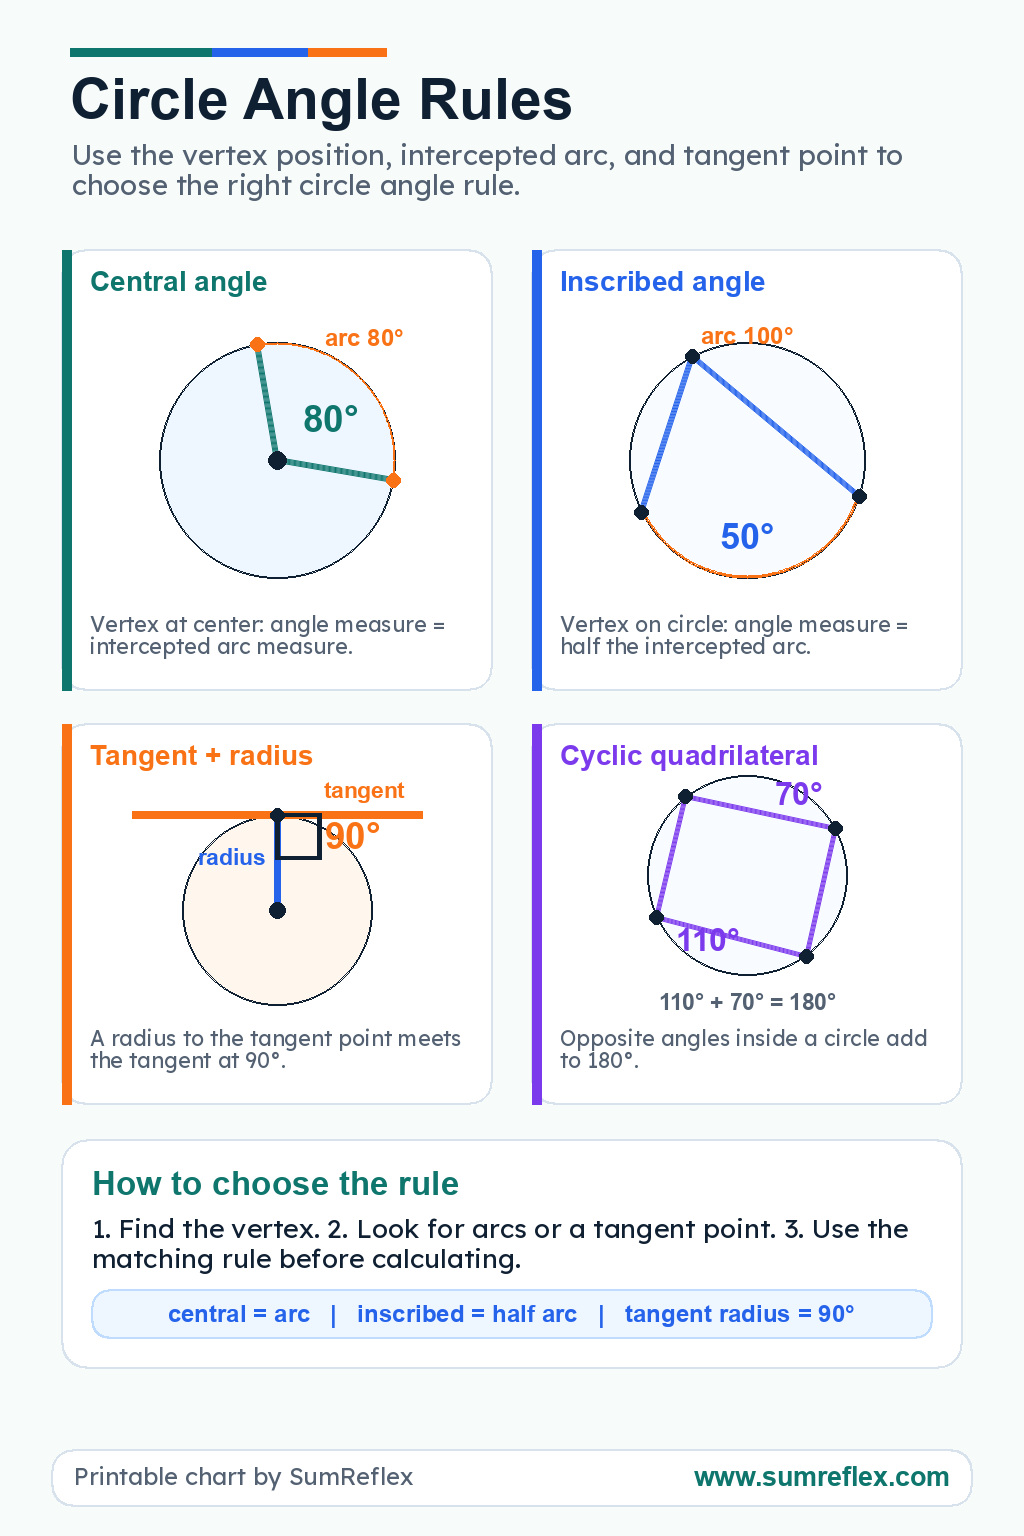
Circle angle problems often look crowded because the same circle can contain radii, chords, tangents, arcs, and quadrilaterals at once. The fastest way to make sense of the picture is to locate the vertex of the angle first. If the vertex is at the center, the angle has a direct relationship with its intercepted arc. If the vertex is on the circumference, the angle usually connects to half of an arc. If a tangent touches the circle, the radius to the point of contact creates a right angle. That first visual decision narrows the rule immediately.
Students who begin by searching their memory for a formula may choose a rule that belongs to a different diagram. This chart turns the search into a sequence of observations. Find the vertex. Name the lines or segments. Look for the arc. Check whether a tangent or cyclic quadrilateral is present. Only then should the calculation begin.
Four rules that should not blur together
The central-angle idea is direct: an angle at the center measures the same as the arc it intercepts. The inscribed-angle idea is different: an angle on the circle measures half its intercepted arc. The tangent-radius relationship is not an arc rule at all; it tells students that the radius and tangent meet at a right angle. The cyclic quadrilateral rule looks at opposite angles and tells students that those two angles add to 180 degrees.
Those distinctions need to stay visible. A student may see an arc and assume every angle uses the half-arc rule, but a central angle does not. Another student may see a four-sided figure inside a circle and forget to check whether all vertices lie on the circle. The chart gives each case its own diagram so students can compare rather than merge the rules into one vague circle shortcut.
Mistakes the diagrams can expose
A useful teacher move is to ask students to justify the rule name before solving. If they say "inscribed angle," they should be able to point to the vertex on the circle. If they say "tangent," they should identify the exact point where the line touches the circle and the radius drawn to that point. If they say "cyclic quadrilateral," they should show that the quadrilateral sits on the circumference at all four vertices.
This justification catches common errors before arithmetic hides them. It also helps students understand why two circle diagrams that look similar may require different reasoning. The image is not just a prompt for calculation; it is the source of the mathematical condition.
Building toward theorem practice
After students can match the chart diagrams to named rules, give them mixed problems without rule labels. Ask them to write one observation sentence before solving, such as "The vertex is on the circle, so I compare the angle with the intercepted arc." That sentence does not need to be long. It simply proves that the rule was selected from the diagram rather than guessed.
Circle angle work connects naturally to broader angle measure. If students need to review measurement systems before trig notation appears, the angle systems conversion chart keeps degrees, radians, grads, and turns in one place. For right-triangle calculations that use angle values after the diagram work is complete, the Right Triangle Calculator can be used as a checking tool.
A compact review routine
Use the chart for two-minute warmups. Show one circle diagram, ask students to name the visible clue, choose the rule, and state the relationship without solving. On another day, give only the rule name and ask students to sketch a small diagram that would match it. Moving back and forth between words and drawings helps the theorem language become visual.